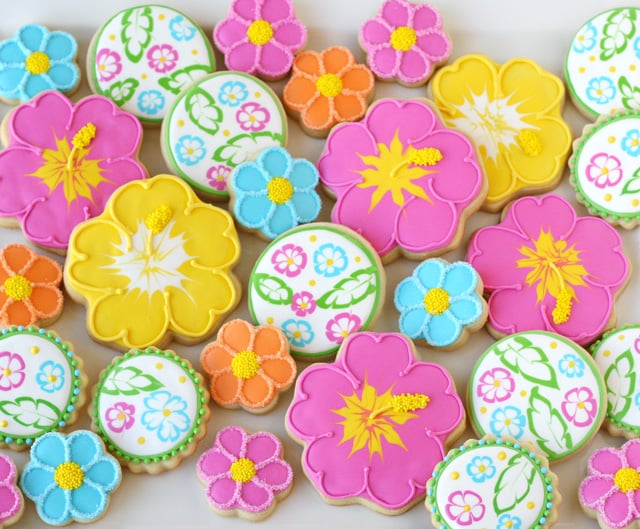
Ok… I hope you’re not too sick of Luau treats! (If you are, hang in there… just two more and then I’ll be full on into fall!)
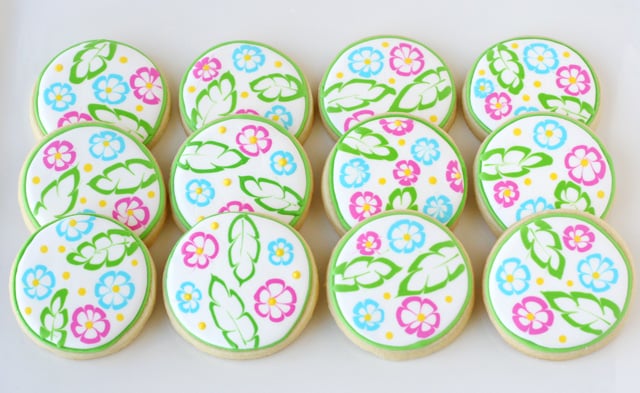
As I plan desserts for the annual Luau party my family attends (and I make special desserts for) I like to add something a little different each year. There are a few favorites I tend to stick with, such as my Hibiscus Flower Cookies (as shown above), but I like to mix in new ideas as well. This year I tried a new design, a wet-on-wet tropical motif on a simple round cookie.
Inspired by THIS SET by Cupookie, I made tropical leaves (just as I did for THESE Luau Cookies), and flowers (similar to the ones I did on THESE Summer Cookies, and Sweet Sugar Belle has a great tutorial on HERE). So, the final design is a Cupookie/Sweet Sugar Belle/Glorious Treats mash up =)
Although the design is a bit time consuming, each step it is quite simple to do, and perfectly appropriate for beginner cookie artists.
Ready to decorate?
First, you’ll need a batch of cookies made with my Sugar Cookie Recipe (or your favorite).
Then, prepare a batch of Royal Icing.
For this design, you can prepare just one bag (or bottle) of each color, mixing it to a medium consistency (when mixing the icing, draw a line through your bowl of icing with a spoon, and the line should heal, or disappear in 12-15 seconds).
This cookie design uses a decorating technique called “wet on wet”, meaning the details are added while the base icing is still wet. Each step of this cookie design should be done back to back, as quickly as possible (with the exception of allowing the green outline of the circle a little time to dry). Complete the full design on one cookie at a time, before moving to the next cookie.
Let’s get started!
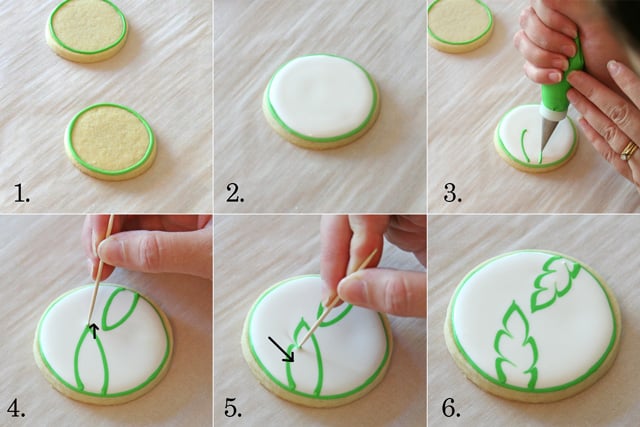
1. Outline your cookie with green icing and allow the icing to set up (at least 30 minutes).
2. Fill in with white icing.
3. Immediately, add simple leaves (as shown).
4. Use a toothpick to create a point at the tip of the leaf, by dragging the toothpick from the inside of the leaf, toward the outside (as shown).
5. Now, add shape to the leaf by dragging the toothpick from the outside edge, toward the inside of the leaf, along both sides (as shown).
6. When you have completed the leaves, quickly continue to the flowers (below)…
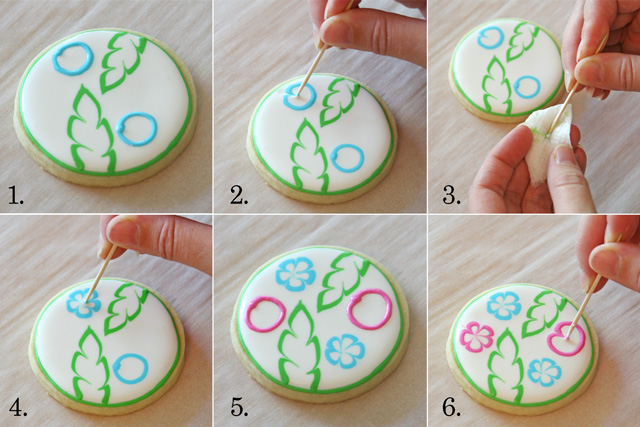
1. Pipe two circles of blue icing (as shown).
2. Immediately use a toothpick to create flower petals, but dragging the toothpick from the outside edge of a circle, toward the center.
3. Throughout this cookie design, use a small moist cloth or paper towel to wipe off your toothpick between each “drag” on the cookie.
4. Continue around each circle, dragging the toothpick from the outside edge toward the center.
5.-6. Add pink (or a color of your choice) circles, and repeat steps 2-4 above.

1.-2. As a final touch (immediately after the previous steps, and while the icing is all still wet), add yellow dots of icing in the center of each flower, and a few random “filler” dots as well.
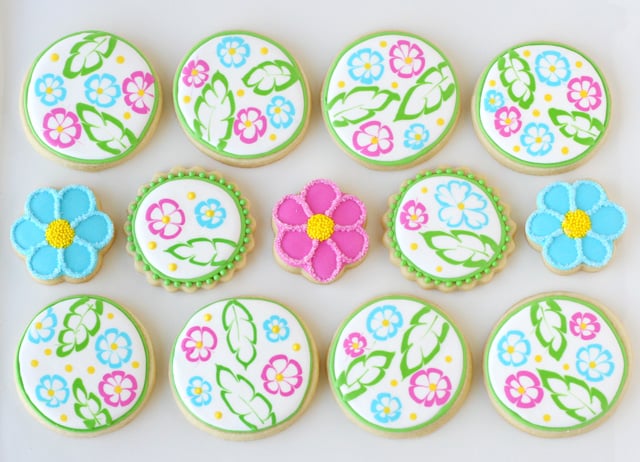
3. The finished cookies. One step I didn’t photograph is adding the little green “vein” detail in the center of the leaf (you’ll notice it in the cookie on the left, in box #3). For this detail, as soon as you have made the leaves, dip your toothpick into an area of the leaf with green icing (to get a little green icing on your toothpick). Then drag your toothpick up the center of the leaf, from the base, to about 2/3 up the leaf.
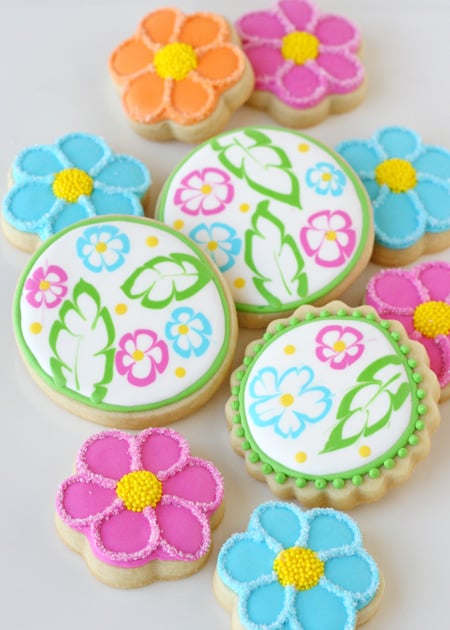
In addition to the tropical flower and leaf design, I made several hibiscus flower cookies (as shown in the photo at the top of this post), and also a bunch of little accent flower cookies. The little flowers were simply outlined and filled in, then I added a pre-made flower center, using Sweet Sugar Belle’s awesome technique! Once the base icing was dry (several hours), I outlined the petal shapes with matching icing, and then immediately sprinkled the whole cookie with white sanding sugar. Shake off (or brush off with a clean, small paintbrush), any excess sugar (onto a paper plate).
Happy Decorating!
Hiç yorum yok:
Yorum Gönder