11 Temmuz 2012 Çarşamba
10 Temmuz 2012 Salı
9 Temmuz 2012 Pazartesi
Enchilada Casserole from Cooking Light
This is a recipe I’ve had saved from forever ago. The printed date on the copied recipe is 2007 and I’ve never once attempted to make it! I know I’m not the only one that does that, or am I? I knew this past weekend would be the perfect time to make this dish. It has been very cold in Las Vegas and I’m looking for a meal to warm me right up.
What I love about this recipe is the use of corn bread as the topping! I don’t know if you know but I love corn bread. I could eat it everyday if I could. Which in reality I can ;). I used my favorite gluten free mix from Bob’s Red Mill.
I made a minor mistake of not reading the directions because once I started I noticed this is suppose to be done in the SLOW COOKER!! Doh! So I improvised and cooked it on 375 degrees for about 35 minutes. I’m sure it be real tasty from the slow cooker because the corn bread would be a lot more crumbly and moist. Other then that the flavors were spot on and this dish had a good kick. I added pepper jack cheese to the top along with cheddar and mozzarella. I didn’t miss the fact that there was no beef or chicken in this dish. It was a really hearty meal with the black beans and roasted corn.
When I make this again I’m going to try the slow cooker method and see how it turns out. I’m usually really good about following directions.
To get the recipe for Enchilada Casserole please visit Cooking Light.

Enjoy,
Fallon
Dangerous Chocolate Bars
Crockpot Cheddar Beer Chicken Tacos
Stronger (What Doesn't Kill You)
Stuffed Chocolate Chip Cookie Dough Bites
July. July. July. Really? It is hard for me to believe that we are half-way through 2012 already. This is my birthday month and I don’t know how I feel about that. But what I do know is that I have a delicious recipe to share with you. I found it from the blog Two Peas & Their Pod, Cookie Dough Pretzel Bites. Basically if you are a fan of sweet and salty you will love these bites. You take raw chocolate chip cookie dough- minus the egg, sandwiched between 2 pretzels, dipped in bittersweet chocolate and a couple sprinkles on top and you can thank me.
The 4th is on a Wednesday and our office will be closed. Kind of interesting to have a day off during the week but I’m not complaining! Last week we had a work BBQ and everyone brought in their favorite dishes. The dessert table was amazing, along with hamburgers, hot dogs, side dishes and fresh fruit. I went home with an empty container because everyone gobbled up these delicious bites of cookie dough goodness. These are best when kept in the fridge and enjoyed chill. They aren’t as messy and something about cold cookie dough just makes me melt! I keep calling them Stuffed Chocolate Chip Cookie Dough Bites because I added a little bit more dough. It is the best part!
The original recipe calls for 1/2 stick unsalted butter but I didn’t have a full stick left. I subbed in the coconut oil and it worked out just fine. The cookie dough was a bit more stickier but I just dusted some more flour into the dough till I found the right texture for raw cookie dough. No one mentioned coconut,so the taste is very faint.
Stuffed Chocolate Chip Cookie Dough Bites
Adapted from Two Peas & Their Pod
Ingredients
For the cookie dough:
1/4 cup unsalted butter, at room temperature
1/4 cup extra virgin coconut oil
1/2 cup light brown sugar, packed
1/2 cup all-purpose flour
1/2 cup powdered sugar
1/4 teaspoon salt
1/4 cup unsweetened vanilla almond milk
1 teaspoon vanilla extract
1/2 cup semi-sweet chocolate chips
Pretzels
2 cups bittersweet chocolate chips
Sprinkles
Directions
To make the cookie dough:
In the bowl of a stand mixer, beat together butter, coconut oil and brown sugar until light and fluffy, about 2-3 minutes. Mix in flour, powdered sugar and salt. Slowly add milk and vanilla extract and beat until fluffy, about 2 minutes. Stir in the chocolate chips. Roll the cookie dough into balls, about 2 teaspoons each. Sandwich between two pretzels and put on a cookie sheet lined with parchment paper. Freeze the pretzel bites for 30 minutes.
Melt two cups of bittersweet chocolate chips, using the microwave (30 second intervals) or a double boiler. Dip half of each pretzel sandwich into the chocolate. Sprinkle bites with sprinkles, if using. Return the tray to the freezer and chill until the chocolate sets. Store the cookie dough bites in the refrigerator until serving time.
Have a Happy 4th of July this week!
Fallon
PS: I can’t stop thinking how HOT Channing Tatum is! I saw Magic Mike over the weekend.. definitely not going to win any fancy awards BUT if the whole movie was 2 hours of just Channing Tatum dancing and grinding, I would TOTALLY be okay with that. Plus if I ever have a boy I’m naming him Channing!
8 Temmuz 2012 Pazar
Giveaway from Bakers Stock
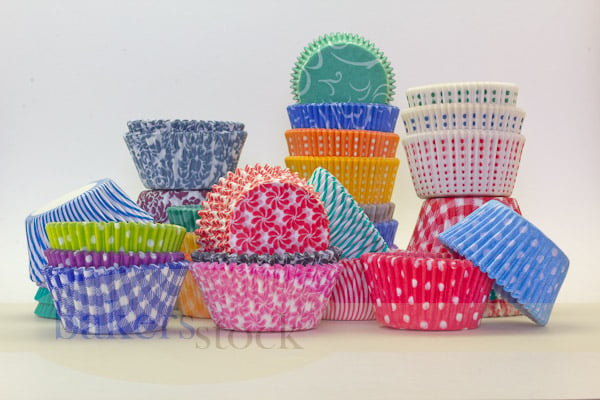
I love pretty cupcake liners! I’ve posted about my favorite liners in the past, in my post Cupcake Basics- Cupcake Liners. I have cupcake liners in most every shape and size… but I still buy more when I find cute ones! One of my favorite sources for quality cupcake liners is Bakers Stock. Today I have a fun giveaway for any of you who love cupcake liners as much as I do!
Surely you need a few of these…

and these…

OOh, and these…
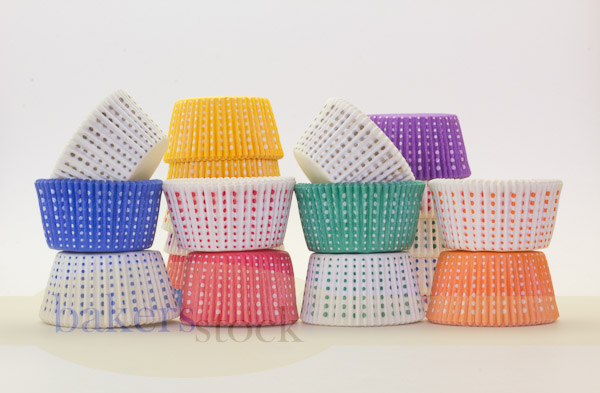
Aren’t they all so pretty!
Bakers Stock is going to send one lucky Glorious Treats winner a $50 gift certificate to use in their shop! That should get you well stocked with lots of pretty liners! And while you’re shopping, you may want to pick up some cute favor bags, cookie cutters, or food coloring too!
Ready to win?
Here’s how to enter…
For one entry- Simply leave a comment below telling me your favorite style or color of cupcake liners… are you a plain and simple brown or white kind of baker, or do you love pretty patterns and polka-dots?
For an additional entry- Like BOTH Glorious Treats and Bakers Stock on Facebook, and come back here and comment that you’ve ”liked” both pages.
*All the details… Giveaway open to residents of the U.S. and Canada. Winner will be chosen using random.org. Giveaway ends Tuesday, June 26th, 2012 at 9:00pm Pacific. Maximum two entries per person. If you are viewing this post as an e-mail, click on the post title (Giveaway from Bakers Stock) to view this post on-line and leave your comment(s) on this blog post.
***************************************** Giveway Closed *********************************************
Winning comment #395 Cheryl
Watermelon Krispie Treats
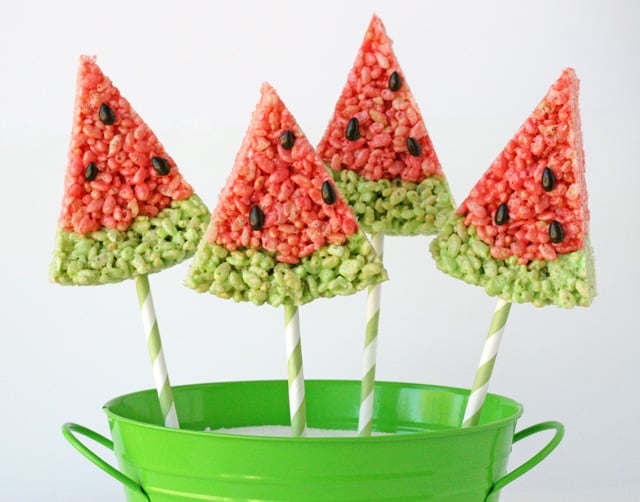
Eating outdoors, enjoying picnics and BBQ’s with family and friends is always one of the highlights of my summer. When planning food (or dessert) for a picnic or BBQ, I need treats that travel well, can handle being left out in the heat, and are easy to eat. Rice Krispies Treats are an ever popular option for casual summer events. I love “fancy” rice krispies treats and am always on the lookout for creative and delicious variations. Last summer, I bookmarked these adorable Watermelon Rice Krispies Treats by Dine and Dish and I’ve been waiting for an opportunity to give them a try. This past weekend, we headed out of town for a family reunion and these cute rice krispies treats were the perfect dessert to bring along. I placed them on the dessert table and all the kids made a bee-line right for them! These are quite easy to make, and will draw lots of oohs and ahhs!

![]()
Watermelon Krispie Treats
These cute treats are perfect for summer get togethers
Yield: 16-18 slices
Ingredients:
For the green (rind) outer ring-
4 cups Rice Krispies cereal
4 cups mini mashmallows
3 Tablespoons butter
green food coloring
For the red (watermelon) center-
5 cups Rice Krispies cereal
5 cups mini marshmallows
3 Tablespoons butter
red food coloring
Chocolate covered sunflower seeds, or mini chocolate chips
Directions:
Prepare 2- 8" cake pans by greasing with butter or non-stick spray.
Make the green (rind)-
Add 4 cups rice krispies to a large bowl, set aside.
Melt 4 cups marshmallows and 3 tablespoons butter in a large bowl in the microwave about 2 minutes, or until very puffy.
Carefully remove from microwave, stir, and add in green coloring.
Pour green marshmallow mixture over the bowl of rice krispies. Stir mixture together, quickly, using a buttered spatula.
Working quickly, divide the mixture between the two prepared cake pans, and press along the sides of the pans, creating a ring about 1.5 inches tall and 1-1.5 inches wide/thick. Rub a bit of butter on your hands as necessary, to prevent the mixture from sticking to your hands.
Make the red (watermelon) center-
Repeat as above, using the ingredients listed (left).
Press red mixture into the center of the two cake pans, press down and smoothign the top surface with a buttered spatula.
Add "seeds"
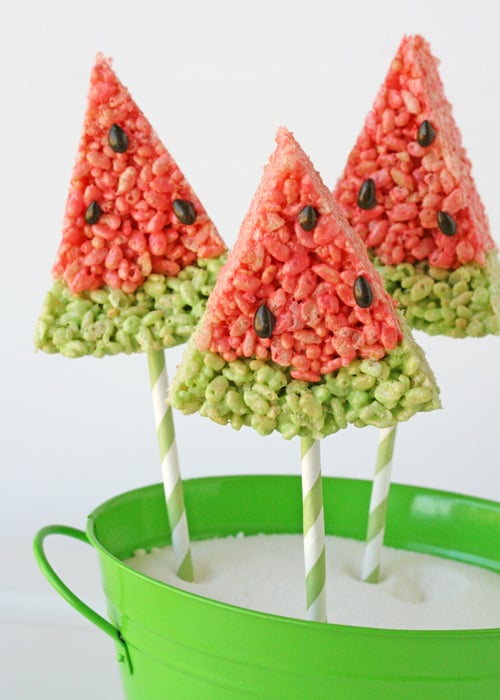
I added chocolate covered sunflower seeds, using a tiny bit of melted chocolate to keep each seed in place.
Recipe Source- Adapted from Kellogs Rice Krispies
Idea Source- Dine and Dish
(shared with permission)
Notes- I used the microwave to melt the marshmallows, but of course feel free to melt the butter and marshmallows on the stove top if you wish.
For the coloring- I used 1 drop of Americolor gel in Mint Green for the "rind", and 2 drops of Americolor gel in Super Red for the "watermelon"

Assembly- Press the green “rind” around outside edge of a prepared cake pan, then make up the red “watermelon” mixture and press it into the center of the pans.

The original idea source, Dine and Dish, used flavored drink mix in the mixture to add watermelon flavor, to match the watermelon look. I didn’t try that this time, but I think it’s a fun idea!
I added some “watermelon slices” onto pretty paper straws (first creating a hole using a wooden skewer). I loved the look of them on the straws and think these would made adorable favors or take-home treats, wrapped in cellophane bags, and tied at the base of the watermelon.
Happy Summer!
4th of July Star Cookies
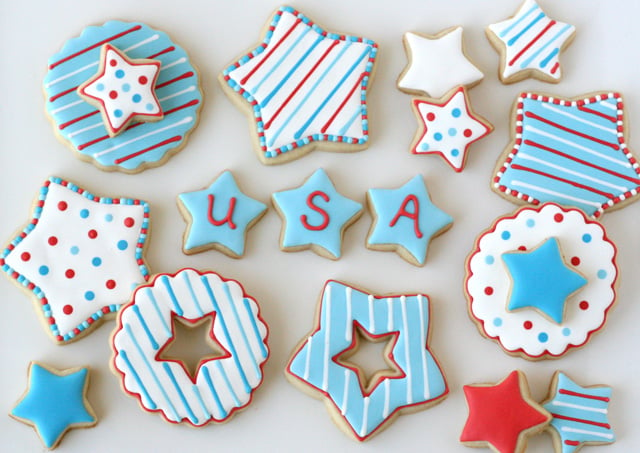
When you’re a cookie decorator, any holiday is a great reason to make some fun cookies! For the upcoming 4th of July holiday, Sweet Sugar Belle challenged some of her cookie friends (including me) to make a festive treat using a star shaped cookie cutter. I wanted to keep them as simple as possible, but still cute =) With just four bags of icing, and a little creativity, I created several fun designs perfect for celebrating Independence Day!

One of my favorite, super simple designs was the star cutout cookies. Using a scalloped circle cookie cutter, and a mini star cutter I made a fun cutout cookie that would be great to add some variety to a platter of star cookies.
To get started, you’ll need a batch of cookies using of my Sugar Cookie Recipe.
When you’re ready to decorate you’ll need a batch of Royal Icing.
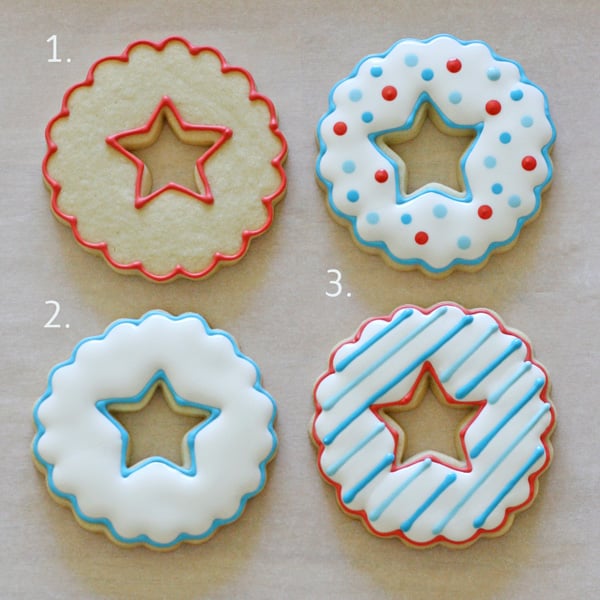
How to Decorate Easy Cutout Star Cookies
1. Outline the outside edge of the cookie, as well as the edge of the star cut-out. Allow this outlining to dry 1-2 hours.
2. When the outside border has fully set (1-2 hours), fill in the cookie with white icing.
3. While the white icing is still wet, add dots or stripes to finish the design.
Notes-
I used only one consistency of icing for each color. This is what I would call a “medium consistency” icing. Thick enough to hold it’s shape around the outside edge, but thin enough that it will settle to a smooth surface. When making this icing, use a spoon to draw a line through the bowl of icing… it should take about 15 seconds (give or take a couple) to fill in the line your spoon made.
I used a #1.5 PME tip for each color. A #2 tip would be the closest alternative.
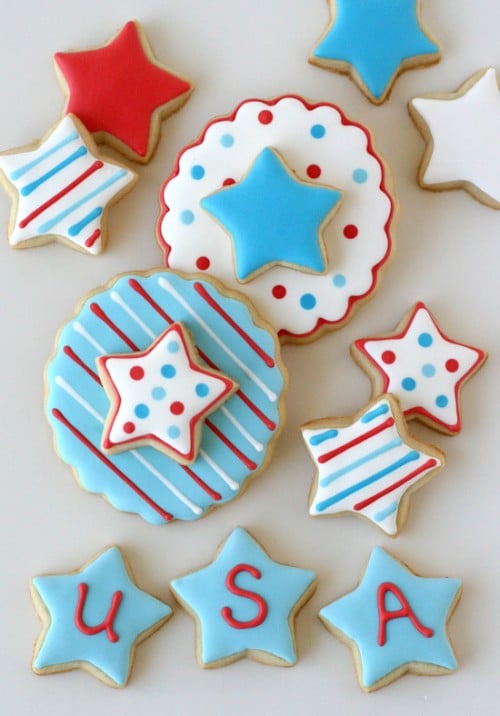
In addition to the fun cut-out cookie design, I played around with lots of other simple designs using a star cutter. I did a few double-decker cookies (a la Bake at 350), in addition to some cute, plain and simple mini stars.
Now here’s the really fun part! I’m not the only one who made star shaped treats today… 20 of my super talented friends did too! Take a look…

Such an amazing collection, isn’t it? I love the variety of designs, all from one simple shape! Please take some time and visit the sites listed below to find the full tutorials for the gorgeous cookies above.
- Strawberry Shortcake on a Stick, The Decorated Cookie
- Patriotic Lace Cookies , My Little Bakery
- Independence Day Parade Cookies, Jill FCS
- Old Fashioned 4th of July, Vicki’s Sweet Treats
- Light up the Fourth Cookies, The Partiologist
- Declaration of Independence Cookie, Vanilla Bean Baker
- Badge of Liberty Cookies, Lila Loa
- Red, White & Blue Star Cookie Towers, Bake at 350
- 4th of July Firecracker Cookies, Klickitat Street
- Star Cut-out Cookies, Glorious Treats (You’re already here!)
- Cookie “Pledge”, Lizy B Bakes
- Star-Shaped Krispie Treats, Cookies and Cups
- Easy Star Cupcake Toppers, Confessions of a Cookbook Queen
- Rustic 4th of July Galletes, Haniela’s
- Patriotic Cookie Wreath, Sweetopia
- Patriotic River Rafter, Ali-Bee’s Bake Shop
- Funny Fox Cookies, The Bearfoot Baker
- Quilted Cookie Stars, Cookie Crazie
- Gimme Your John Hancock Stars, Life’s a Batch
- Patriotic Cookie Stir Sticks, The Cookie Artisan
- Patriotic Floral Stars, SweetSugarBelle
Thanks so much Callye for organizing such a fun project!
Blackberry Vanilla Cupcakes {in a jar}
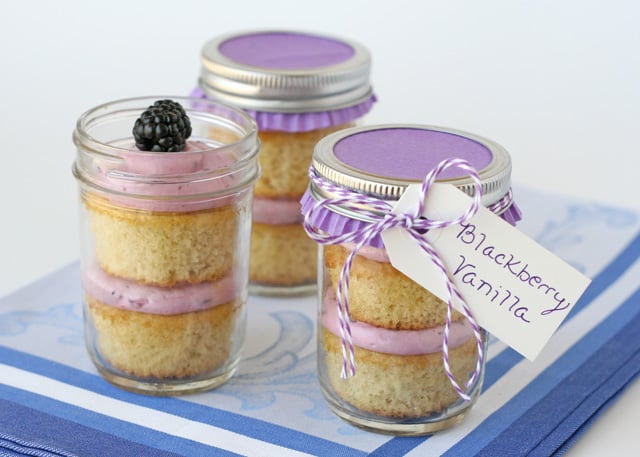
As we enjoy the summer (here in the U.S.) and a holiday weekend (celebrating Independence Day), it’s the perfect time to enjoy summer’s bounty of fresh berries! And any treat that is easy to eat and easy to transport is an extra bonus!
Unless you’re new here, you know I have a special place in my heart for desserts in jars. I love serving (and eating) pretty, individual treats. Whether you use the jars simply as a serving vessel- and leave them open, or top them with a lid for transport or gift giving, jarred desserts are always extra special.
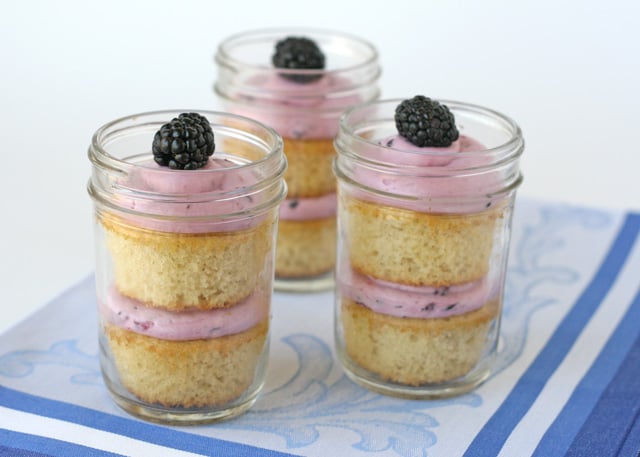
For this pretty summer treat, I layered delicious Vanilla Cupcakes with fresh Blackberry Buttercream. The frosting is so delicious! It reminded me of homemade ice cream.
Using fresh, organic berries from Whole Foods Market, I experimented with the frosting, and made a second batch using raspberries. It was just as lovely, and had a beautiful pink hue.
![]()
Blackberry Buttercream
This delicious frosting is a perfect way to use fresh summer berries!
Yield: Enough frosting to pipe a swirl on 22-25 cupcakes, or frost and fill an 8" cake
Ingredients:
3/4 cup (1 1/2 sticks) butter (still cool)
8 oz. (1 block) cream cheese (directly from fridge)
4 cups powdered sugar
1 teaspoon pure vanilla extract
3 Tablespoons blackberry puree (from about 1/2 cup fresh blackberries)
Directions:
In the bowl of a large electric mixer, beat the butter until smooth.
Add the cream cheese, and beat further until the butter and cream cheese are fully incorporated and smooth.
With the mixer on low, add the powdered sugar, one cup at a time.
Add vanilla.
Again, with the mixer on low, add the blackberry puree, one tablespoon at a time.
Continue beating, increasing speed to medium for about 30 seconds.
Depending on the temperature in your kitchen, and the moisture in your berries, the frosting may be on the soft side. I put the whole bowl of finished frosting in the refrigerator for about 1 hour to help the frosting firm up. If needed, you could add an additional cup of powdered sugar.
Frost cupcakes as desired, or layer cupcakes and frosting in a jar.
Recipe Source- Glorious Treats (simply a variation of my American Buttercream recipe)
Notes- To make the blackberry puree, use about 1/2 cup fresh blackberries and blend them in a food processor or blender. I left the seeds in, but you could use a strainer to remove the seeds if you prefer.
This frosting is equally delicious using fresh raspberries in place of the blackberries.
I have only made this recipe with fresh berries. If using frozen berries, you will likely need to use an additional cup of powdered sugar, as the frozen berries will release more moisture.
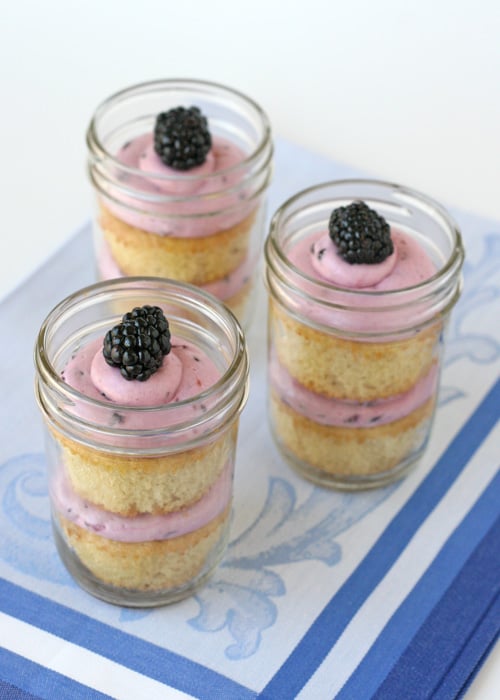
To assemble the cupcakes in a jar (as shown), I use two smallish cupcakes (using my Vanilla Cupcake Recipe). Bake the cupcakes according to the directions, using paper liners. Once the cupcakes are baked and cooled, remove the liners. For cupcakes in a jar, I usually cut the cupcakes in half (horizontally), and use a total of 1 and 1/2 cupcakes per jar, but I baked these vanilla cupcakes a bit on the small side, so two full cupcakes worked perfectly.
Add one cupcake into a 1/2 pint canning jar (available at Wal-Mart, many grocery stores, or on-line).
Pipe a swirl of frosting.
Add another cupcake, and top with another layer of frosting.
Finish with a fresh berry, if desired.
Serve jars open, or top with a lid. Eat using a fork or spoon.
Enjoy immediately, or store in the refrigerator, topped with lids, up to two days.
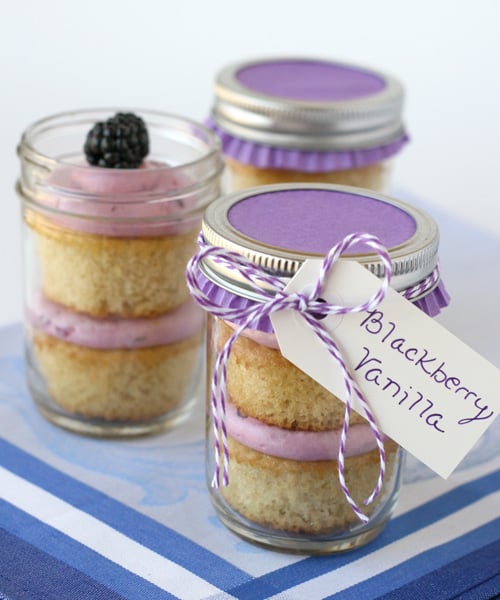
For a pretty presentation, I added a purple cupcake liner (from Confectionery House) and twine (from The Twinrey). I flattened out the cupcake liner a bit, placed it over the lid of the jar, then screwed on the lid ring. I added a little tag, and tied it with twine. I like that the finished jars reminded me of jars of jam at a county fair.
Happy Summer!
Disclosure- Berries provided by Whole Foods Market, the photos, recipes and text are all my own.
Glorious Treats in Artful Blogging Magazine

I’ve been meaning to share this for over a month… but time just keeps clipping by! Earlier this summer I received some extra fun mail… a beautiful issue of Artful Blogging Magazine, including a 6 page spread featuring Glorious Treats (me!). As the title suggests, the magazine features blogs that are visually appealing, inspiring, and “artful”. Artful Blogging has been on my “blog bucket list” for quite some time. Needless to say, I was quite thrilled when I received an e-mail many months ago asking if I’d like to be featured!
Artful Blogging features blogs in many categories… from food, to home decor, fashion, to crafting and fine art. Each feature is written by the Blogger, and focuses on how their site reflects their connection to and love of art.

Here is my article, as featured in Artful Blogging (Summer 2012)…
All of my life I’ve been considered artistic, but I never really considered myself an artist. I have always had a passion for color and design, and loved crafts of all kinds,but I thought of an artist as someone who could draw or paint beautiful things. Although I enjoyed painting and drawing classes from childhood through college, I knew those areas of art were not where I shined. As a child I dreamed of being a fashion designer or architect, then as an adult I fell in love with floral design. I spent 8 years working as a floral designer, quitting my job when my second daughter was on her way. I had thoroughly enjoyed my work as a floral designer, and immediately felt a need in my life for another creative outlet. I signed up for a couple classes through my local parks and recreation department for “Gourmet cookie decorating”and “Gourmet cupcake decorating”. The very first night of class I felt a light bulb go on over my head andI knew I had discovered my new creative passion, edible art! I threw myself into this new craft, buying books and searching the web for ideas and instructions. As I began sharing my edible projects with family and friends their feedback was so encouraging. I felt like I finally found my perfect art medium, food.

Shortly after taking those first cookie and cupcake decorating classes I began sharing photos of my baking projects on-line on Flickr. Through Flickr I discovered artists around the world creating the most amazing edible masterpieces I’d ever seen. This community of bakers were talented beyond words, but also generous and encouraging. I have several friends still today that I first “met” on Flickr. Overtime, as I continued sharing photos of my cookies, cupcakes, cakes and occasional crafts on Flickr I began receiving quite a few e-mails from Flickr contacts asking for recipes and tutorials on the creations I was posting. I was happy to share my knowledge, as others had done for me. After I while I found I was answering the same questions again and again. I realized that a blog would be a great way for me to keep sharing my edible art, but also share the recipes and techniques I was using. I spent a few months reading up on how to run a successful blog, and reading several beautiful and inspiring blogs. In February of 2010 I published my first posts. I knew that blogging would require quite a time commitment, but I was determined to build a site I could be proud of and a site that would become a great resource for my readers.

Since those early posts I have learned a lot about blogging, and a lot about myself. I’ve discovered that blogging can be both a demanding and rewarding job (I’m using the word job here very loosely). Blogging can include some fun perks, whether it is a box of baking supplies to “sample” or the opportunity to create friendships with creative women around the world. Blogging pushes me to transform simple ingredients and supplies into something extraordinary. And blogging constantly challenges me to grow as a baker, a photographer, a writer and a business woman.
Blogging has become a bigger part of my life than I ever imagined. I love having a place in the world (even if it’s only a “virtual”place) where I can share my love for art, color and design, all through beautiful food! My nightstand is often piled high with cookbooks, and I find inspiration for new projects everywhere I go. A beautiful color can spark an idea for a whole dessert display, and a fun pattern is almost immediately turned into acookie in my mind. I will always have a deep love for art in many forms but have found such joy in discovering an artform that people can enjoy not only with their eyes, but also with their mouths.
~By Glory Albin, as featured in Artful Blogging (summer 2012)
Each of the images included in the article are from previous blog posts. If you’ve missed any of them, here’s a quick reference list…
First layout- Pina Colada Cupcakes, S’mores Cupcakes, Fudge Mint Brownies, Orange Dreamsicle Cupcakes in a Jar.
Second layout- S’mores Decorated Cookies, Maple Mini Doughnuts, S’mores Pops, Black and White Halloween Table, S’mores Rice Krispies Treats.
Third layout- Cupcake Liners, Perfect Vanilla Cupcakes, Pink Ombre Swirl Cake.
Artful Blogging can be purchased on-line, and is also sold at major craft stores.


